Note
Your task sequence must contain at least one group inside it in order to update it with CSM
In some cases, you might want to change the task sequence that CSM will automatically add newest application versions. In this example, we will create a new task sequence and add it as a nested task sequence into another task. This would make it possible to update multiple task sequences simultaneously.
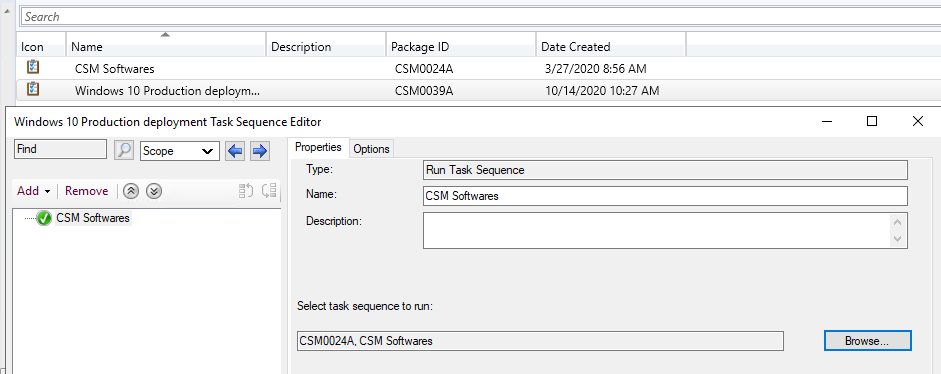
- Open Configuration Manager console and create a new task sequence and at least one group in it. In this example, we will use "CSM Softwares". Add this task sequence into your other task sequence(s)
- From Centero Software Manager, go to SCCM Integration->SCCM Settings->General Settings and choose Reload. This will reload the changes (new task sequence) in MECM manually
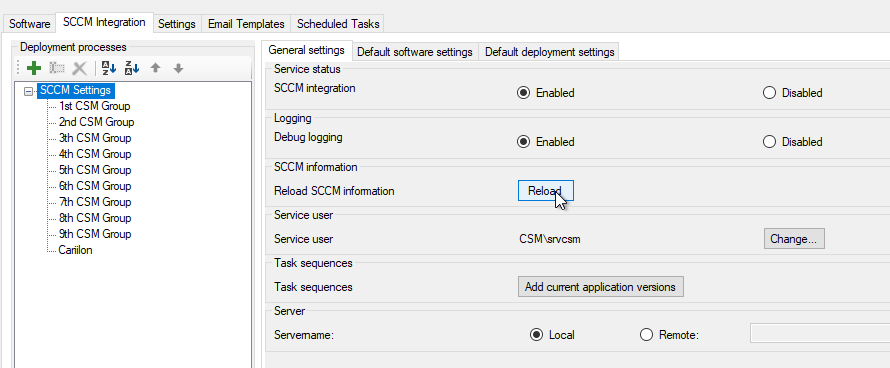
- Select your deployment process and go to deployment settings
- Change the task sequence into new one (Windows 10 Production deployment->CSM Softwares)


- After the change, you can add the newest versions that are already in Configuration Manager into your new task.
- Go to SCCM Integration->SCCM Settings->General Settings and select Add current application versions.

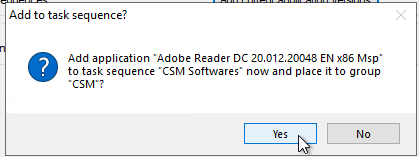
- Confirm the change


After the change, you should remove CSM added applications from the older task sequence, so they can be retired in MECM when a new application version is released!
